Els Slots
Tips for using multiple images in your reviews
Increasingly, members are utilizing the new feature to include multiple photos in their reviews. Here are a few tips on how to let them turn out best:
1. The Featured Image MUST BE a horizontal one
The first photo you add is the 'Featured Image': this is the one that is used as the identifying thumbnail in all the overviews, such as on the Homepage and the Site page. It is also the one that will appear in the banner at the top of your review. Since that banner is very wide, the photo you upload must be suited to that format. Think of it as a panorama photo. Landscapes and scenes taken from a certain distance work best; close-ups of buildings or animals don't.
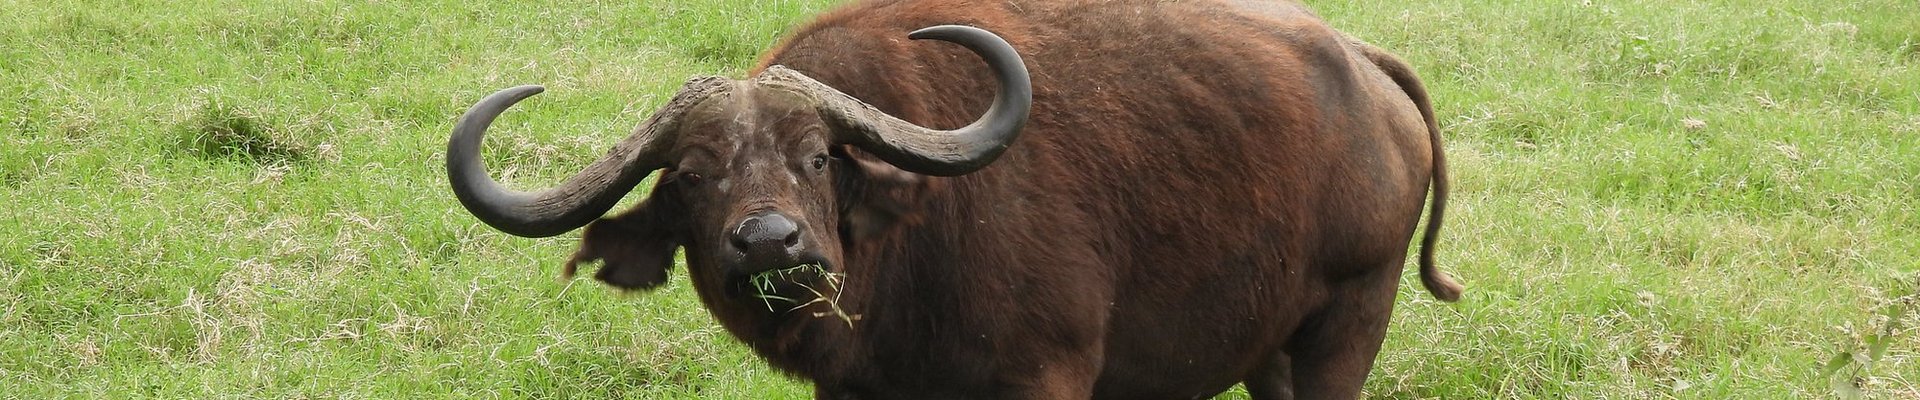
In the example below, the giraffe won't work as its head will "escape" the wide format of the banner. This is in contrast to the buffalo, which is centered in the image and is not fully zoomed in.

2. Use the option FULL WIDTH by default
The remaining photos you add to the Body of your review. You can add them to all places in your text that seem suitable (via typing / and then choosing an image). You will be asked to choose a format: here, the standard option is to use FULL WIDTH (with or without caption). This fits best if you want a simple layout like: a paragraph of text - a photo - some more text - another photo, just like I did in my recent Klint review.
If you want to use left align or right align (this works similarly to MS Word, so the text will wrap around the photo), make sure you:
- Are working from a full-size screen (so on a PC or laptop, not a phone or iPad): on the smaller screens, you cannot verify how the wrapping works.
- Have considerably more text than photos: to wrap text around one horizontal ("landscape") image, you'll need at least two paragraphs of text for that single photo, and for a vertical ("portrait") image, that would increase to at least three or four.
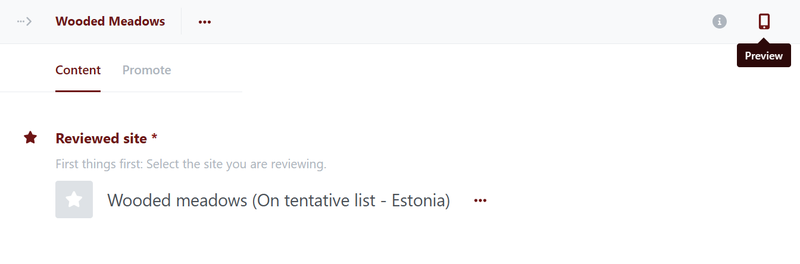
3. PREVIEW first before submitting
Once you have finalized your draft and included all photos, use the Preview option to view what it will look like when published. Adjust where needed before Submitting for Approval.
You can find the Preview option here, starting from the Edit Mode in your review. The Preview option is in the top right corner of your screen:
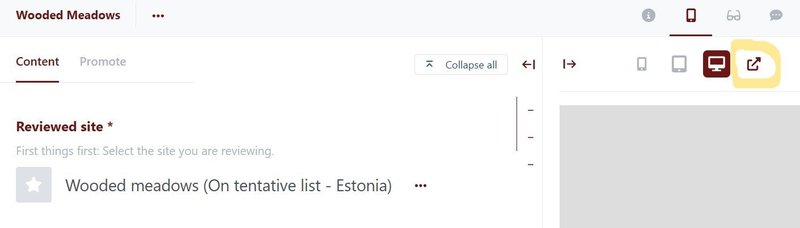
And next, choose the option to the far right (marked yellow in the image below) to open the preview in a new window:
Comments
No comments yet.